Cold Brew Comparison: The Madness and the Method
Archived in 2022
Originally posted on 16 Sep 2013
Cross-posted from a post I authored for BrewPony.
The Plan
A couple of weeks ago I read an article on Slate which claimed that the best cold brewed coffee is attained by adding some fresh mint while brewing.
The best? REALLY? Well, let’s find out.
 I resolved right then and there that the next shipment of coffee I received from BrewPony would be dedicated to testing out this claim. I would make a batch of plain cold brew and a batch which includes some fresh mint and then do a head to head taste test.
But then I got to thinking… If I’m going to go through all the effort of doing a taste test, why don’t I just take that sucker to eleven? Sure, it could be possible that a mint cold brew is better than plain, but in order to tell whether it’s absolutely the best shouldn’t I compare it to other cold brews which include a non-coffee ingredient in the infusion? I mean, if mint really is the best then it should beat any brew, right?
I shared my plan with the BrewPonies, who agreed that it was the right sort of crazy and vowed to do whatever they could to enable my madness. A week later a large box of coffee arrived in the mail. The game was afoot.
The Method
The general idea of my expanded plan was:
- Create several identical batches of cold brew
- Add one additional ingredient to each batch but one, reserving that plain batch as a control
- Enlist friends to come over to taste and rate each batch
- Determine once and for all which is the best cold brew
I sat down and brainstormed possible ingredients, eventually coming up with a list of six:
- Cinnamon stick
- Orange peel
- Mint
- Lemon peel
- Vanilla bean
- …and soy sauce. Yes: Soy sauce
Before you freak out about that final ingredient, please remember that there is a long tradition of people adding a pinch of salt to a cup of coffee. It’s said to soften the bitterness of a bad or dark brew. I wanted to see how it would affect cold brew, but I also wanted something a little more complex than a basic kosher salt. Soy sauce fit the bill perfectly.
Immense thanks are due to Ben Hengst for collaborating with me to experiment and find the correct proportion of soy sauce to use in the cold brew. He and I both drank some absolutely dreadful concoctions so you wouldn’t have to. Oh, the things we do in the name of science…
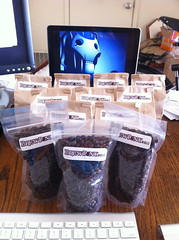
Ingredients selected, it was time to figure out the all important coffee portion of the brews. All batches must use exactly the same amount of exactly the same coffee. Reviewing the trove of goodies shipped to me from BrewPony HQ, I determined that I had enough to create eight batches of cold brew using 125g each of Schondecken air roasted Guatemalan{.broken_link} from Rose City Roasters.
There are those who say that a cold brew should be a 1:2 or even a 1:1 proportion of coffee to water. I have never enjoyed brews of that sort. They’re thick and unappealingly bitter, even for me. In addition, I was pretty sure that a brew that coffee-forward would entirely overwhelm any additional ingredient.
Therefore I opted for a 1:5 proportion of coffee to water. This would put me at 625g (aka 625ml) of water for each batch. At those proportions I should be able to do each batch in a single one quart Mason jar and have enough brew of each type to allow my tasters adequate portions.
 The coffee was ground moments before adding water. I used my old electric Capresso burr mill grinder (well-cleaned and -detailed before starting), since my madness did not extend to hand grinding a kilogram of bean in my usual (but small) Hario Skerton. I used setting 4.5 on my Capresso, generating a grind of medium coarseness. Much finer and I feared it would never make it through the filter when straining it the next day.
Each special ingredient was added just prior to the water. I nestled each nice and cozy in a bed of tasty, tasty coffee grounds.
The water used was my normal San Francisco tap water. No other treatment was applied to it. Our municipal water comes from the Hetch Hetchy Reservoir in Yosemite and, on its own, is pure enough that it passes all water quality tests without need for treatment. It’s fine stuff and brews a nice cup.
 Immediately after adding water for a batch, I screwed the cap onto the Mason jar and shook the crap out of it to make sure everything was nicely incorporated. However, afterward I loosened the cap again. This was very fresh coffee, and while it wasn’t generating much of a crema foam it undoubtedly was still putting out a fair bit of carbon dioxide. By the time I finished preparing eight batches, my kitchen was already quite covered enough with coffee. I didn’t need to add exploding Mason jars of cold brew to that chaos.
The brews sat for almost exactly 24 hours before they were strained. Four times during that day I picked up each batch and shook it to distribute the grounds in the water.
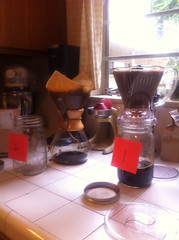
 Straining all eight batches took several hours the following morning, even when using two separate filtering setups. I used both my large Chemex as well as my Clever Dripper. Unfortunately I did not get the chance to measure the resulting brew for each batch. That’s a shame, because judging by the levels in the jars of strained brews it appeared as though the Chemex was straining out several more milliliters than the Clever Dripper was. Without metrics to prove that I’m left only with an anecdote and a question: Why would the Chemex do a better job of straining?
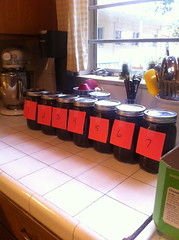
In the end I was left with six jars of nearly half a quart each of “ingredient” brews and one jar almost three quarters full of the two batches of plain brew.
The tasters would arrive in an hour.
Next up: The tasting results and conclusions drawn from the experiment!